The architecture of LarkXR is as shown in the following diagram:
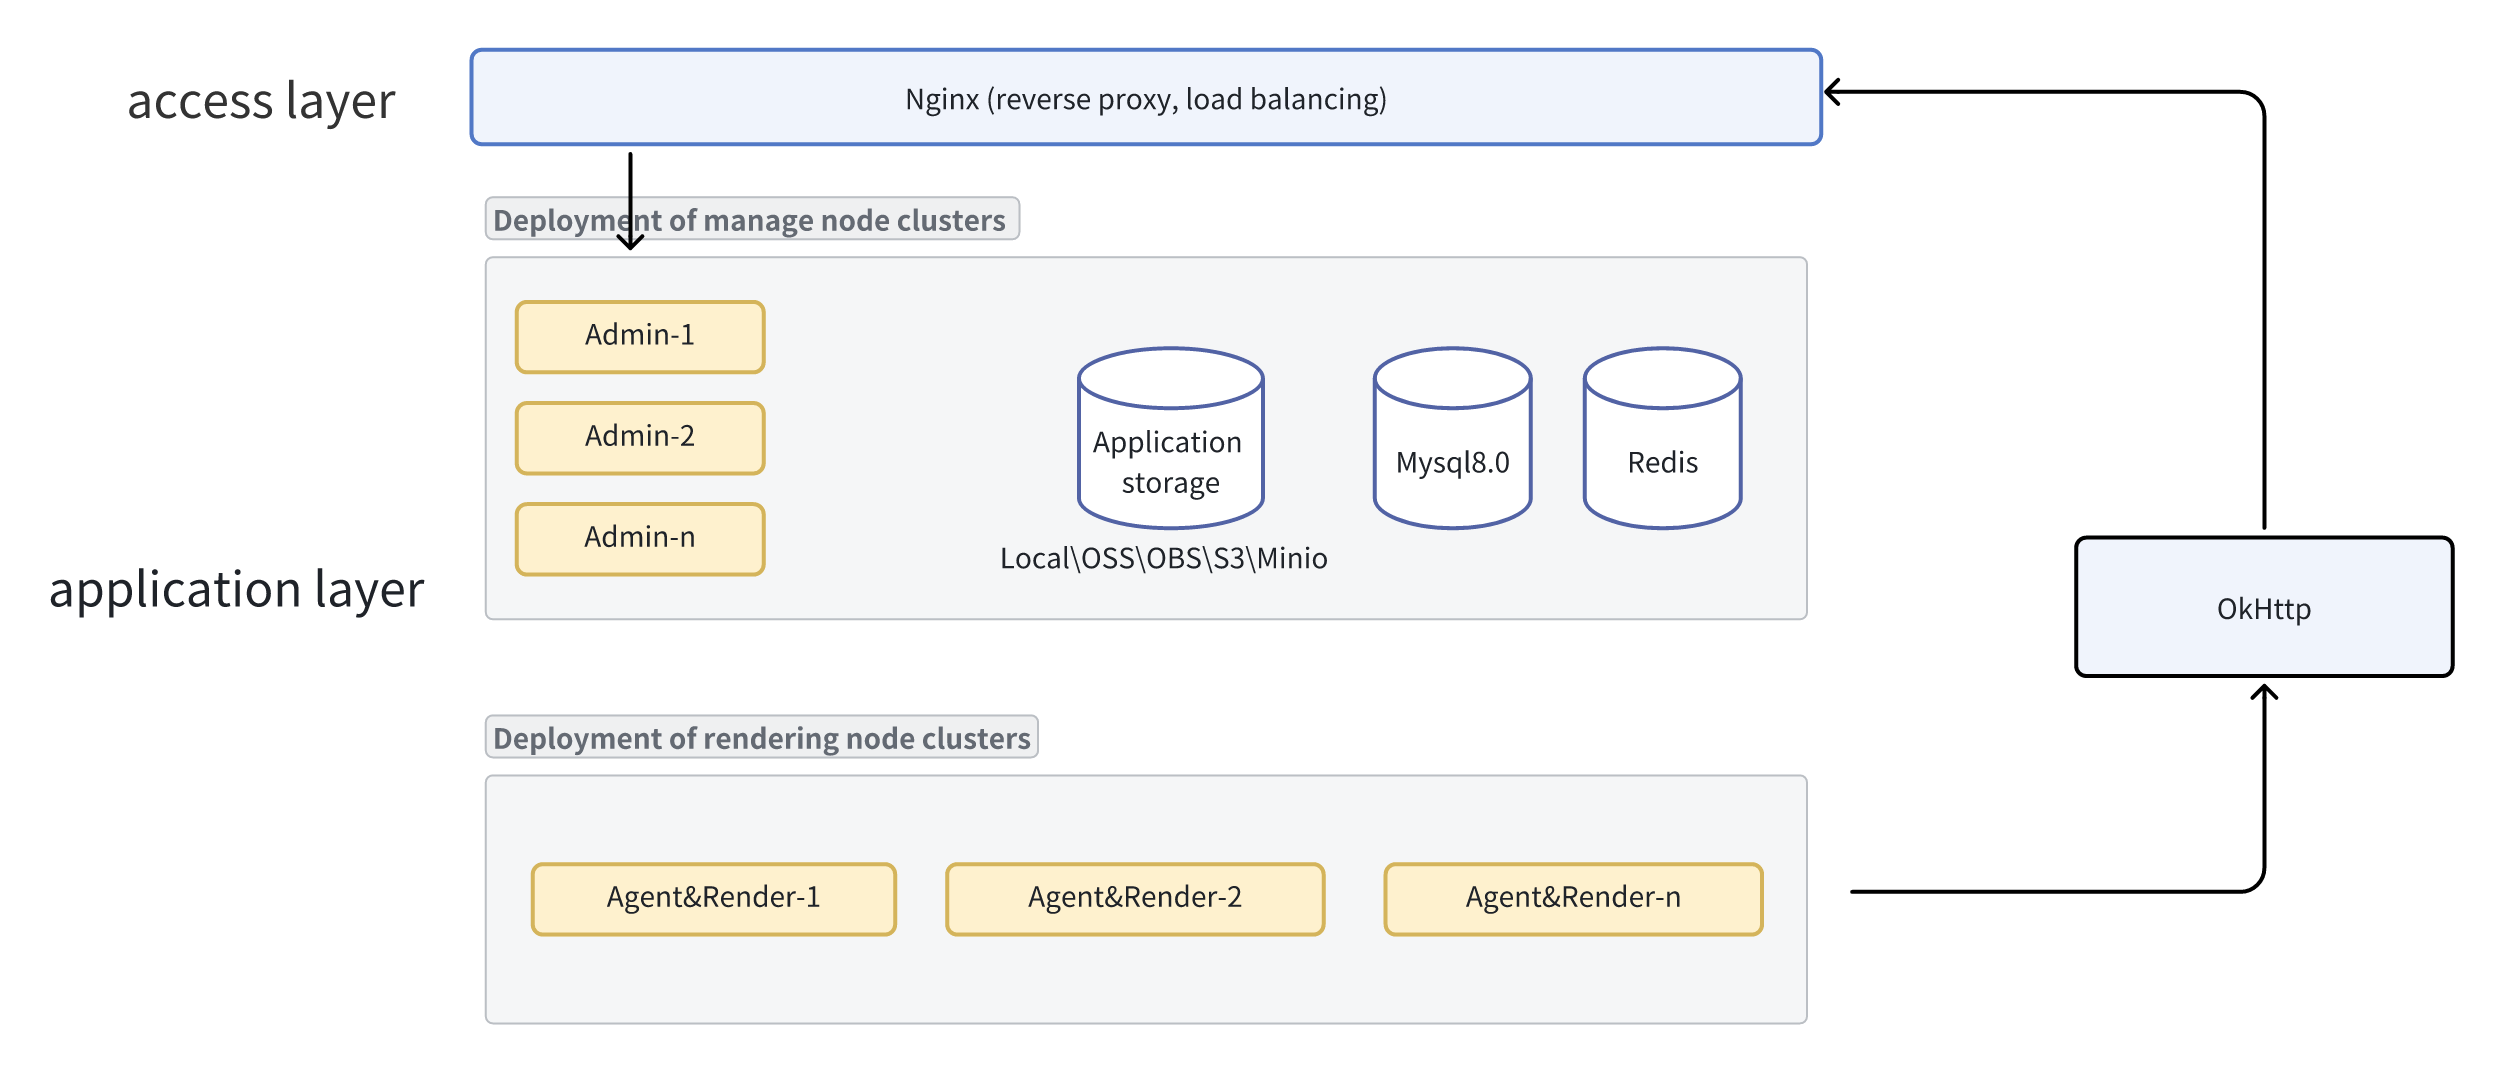
The system adopts a distributed microservices architecture, including central management services, synchronization/proxy services, core rendering services, caching services, object storage, and data storage, among many service components. This architecture supports both single-machine deployment and cluster deployment, providing flexibility and versatility. Based on the requirements of the actual production environment, services can be split and combined to meet different usage scenarios.
The system provides packages for both single-machine deployment and simple cluster deployment. In single-machine deployment, all services are deployed on a single GPU server, while in simple cluster deployment, core rendering services and synchronization/proxy services are deployed on separate GPU servers, and management programs and storage-related services are deployed on non-GPU servers. By increasing the number of GPU service nodes, the system's concurrent processing capabilities can be enhanced.
To meet the requirements of high concurrency and high availability, services on the management nodes can be further split and deployed on independent servers, and each service can be redundantly deployed for high availability. This chapter will introduce how to split service components and modify configuration files to implement these deployment scenarios.
Server Preparation
| Function | Version | Configuration | System Version | Number of Units | Remarks |
|---|---|---|---|---|---|
| Redis | 6.0.8 | 8-core 16G | Ubuntu 20.04 | 1 | |
| Nginx | 1.21.0 | 8-core 16G | Ubuntu 20.04 | 1 | Download the simple cluster version package from the official website |
| Database | Mysql8.0 | 8-core 16G | Ubuntu 20.04 | 1 | Requires manual creation of larkxR_center database with utf8 encoding character set |
| LarkXR Management Services | 3.2.8.2+ | 8-core 16G | Ubuntu 20.04or Windows | 1 | JDK-17 installation required |
| LarkXR rendering service | 3.2.8.2+ | 8-core 16G | Windows Server 2019 | n |
LarkXR Program Installation and Configuration Guide
To install the simple cluster version of the LarkXR program, please visit https://paraverse.cc/larkxr-resource/ to download the program package.
For Windows version on the management node (using the larkxr-center-windows folder):
Step One: Configure the Local IP Address
- In the deployment directory's
application.propertiesfile, setserver.node-ipto the local IP address and disable other service components as shown in the image below, keeping only theadmincomponent.

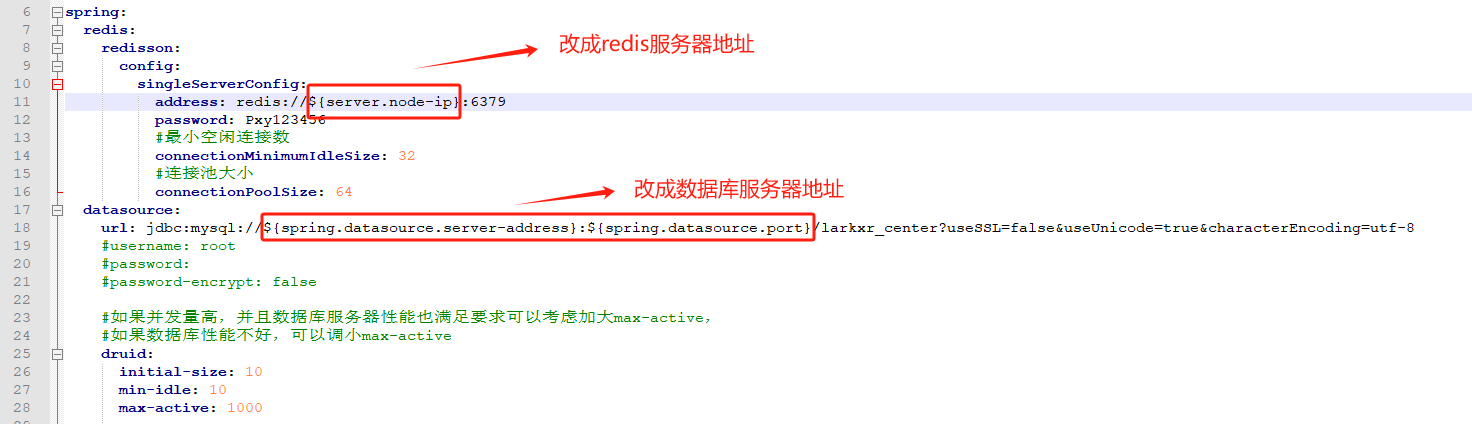
Step Two: Modify Redis and Database Configuration Addresses
- Open the
admin\application.yamlfile in the deployment directory and modify the Redis and database configuration addresses as needed.
Step Three: Modify Nginx Configuration Items
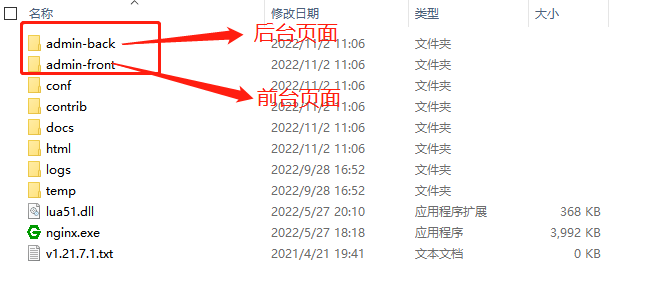
- Place the configuration files from the downloaded simple cluster version Nginx folder (including
conf->conf.d,admin-back,admin-front) into the Nginx server deployment directory. Ensure thatnginx.confincludesinclude conf.d/*.conf;. If deploying on Windows, maintain the same directory structure as the program package. For Linux deployment, adjust paths accordingly to ensure these folders can be found for static page mapping.
- Configure the reverse proxy address for the backend interface to the main node IP address.
Requirements for Configuring Multiple Master Nodes:
Step One: Configure Another admin Service
- Configure another admin service following the methods above and start the additional admin service.
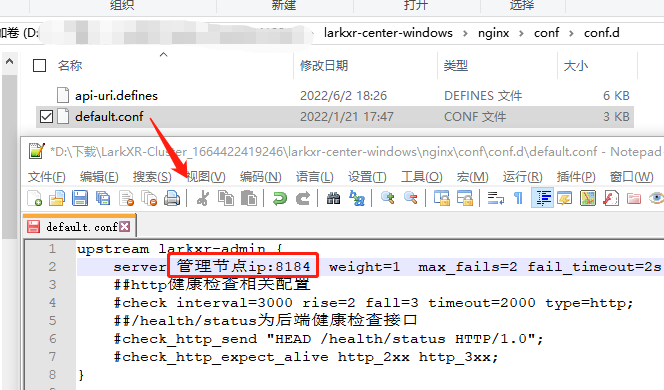
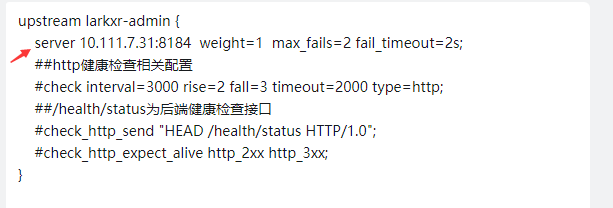
Step Two: Modify Nginx Configuration Items
- Add a server configuration item as shown in the image below.
Step Three: Change Application Storage to Object Storage
- In the system settings of the backend management page, change the storage method to object storage. For specific instructions on how to make this change, please refer to How to Change to Object Storage?
Step Four: Configure the application.properties File for Multiple Master Nodes
- In the
application.propertiesfile, configurepxy.id-generator.workerIdas 0, 1, 2, etc., for multiple master nodes to avoid primary key conflicts.
Using Cloud Images for Public Clouds, Batch Starting Rendering Programs
- Refer to this link for using cloud images in public clouds and batch starting rendering programs.