LarkVR3.3
3.3 VR Environment
Hardware Environment
CPU
GPU
Memory
sound card
Software Environment
Operating System
Chrome Browser
VC Runtime Library
DX Runtime
Text Editor
Virtual Sound Card Driver
Virtual Camera Driver
Virtual Handle Controller Driver
Steam VR
System Settings
Turn Off Application Running Notification
Turn Off Antivirus and Firewall
Setup Automatic Login
Set Never SleepNever Turn Off the Display
Using dongle settings
3D Program Adaptation
Program Adaptation Requirements
Installation and Deployment
System Components
Stand-Alone Version
Simple Cluster Version (Windows)
Deployment in Detail
Stand-Alone Intranet
Stand-Alone External Network
Cluster intranet(Windows)
Cluster external network(Windows)
Cluster intranet(Linux Docker)
Cluster external network(Linux Docker)
Deployment Case Study
Edge cluster deployment
LarkXR NAT
LarkXR Turn
Nginx reverse proxy
Server Port Mapping
Advanced Cluster Deployment
GPU dedicated server
Server Deployment Guide
Operating System Precautions
Using
client support
Quest
Pico Neo3
Overview
Backend usage instructions
Login
Data center
Monitor
Usage Statistics
clientErrLog
Applications
Package Management
Package Overview
Add Package
Update package
Delete Package
Application Management
Applications
Add Applications
Noun interpretation
Run Applications
RunApplications
Synchronization management
Index
Client List
VR&AR Client Management
Group Mgt
Group management
Client Monitoring
System Setting
Access Auth List
Workspace
Param Setting
LicenceType
No Operation Timeout
Store
Safe
Region Setting
Custom Logo
Short Note
Port Mapping
Dispatch Policy
Current Limiting
Theme
Users
Change Password
change PWD
Port Forward
guides
Custom
EnterAppli
Server-side
Application Storage
Standalone
Local Storage
OSS Storage
AWS S3
Cluster
Local storage
OSS Storage
AWS S3
General Features
Disk Space
Feature Components
DataChannel
Additional Parameters
Smart Voice
video input
voice input
Security Settings
Feature Components
Redis
MySQL8
Database Monitoring(druid)
Change userName and PWD
Disable
HTTPS access
Windows
Linux Docker
App Auth
Workplace Access Encryption
SDK ID for encrypted secondary development
security setting
Use AppliList Page
IP Blacklist-Whitelist
Allow Cross-Origin
CORS
Cors For Upload
Frequently Asked Questions (FAQ)
list of common issues
Update Log
product updates
-
+
首页
guides
## Scene This functionality is designed for scenarios where the management node has a public IP address,while the rendering nodes do not have public IP addresses. ## Implementation Method By setting up a custom proxy forwarding service,the rendering nodes can forward their services to the external network via the proxy,enabling the rendering nodes without public IPs to provide services normally. ## Deployment Method • Linux Docker ## After Decompression Use the`larkxr-center-docker`folder.The directory structure is shown in the figure below. Modify the`application.yaml`file under the`admin`folder,following the four steps indicated by the dashed lines ```yaml # NAT Forwarding Proxy nat-proxy: # Enable this when using NAT forwarding to solve the issue of lacking a public IP # 1. ------------Set to true ------------ enable: true # Operation mode: client/server # 2. ------------Set to server mode ------------ mode: server # LarkXR Management Node used with an independently deployed NAT service in server mode server-mode: # Configure the address of the NAT Server API, such as: http://192.168.0.6:8183 # 3. ------------Set the API address for NAT service interaction ------------ api-server-address: http://192.168.0.164:8183 # LarkXR Management Node as a NAT client mode (not applicable here) client-mode: # NAT Server IP or domain name server-host: server-port: 20001 # clientKey provided by NAT Server client-key: # Turn Service: Windows version does not support Redis for persistent user information, while the Linux version does. # Therefore, if the Windows version enables the server mode of the forwarding service and needs to dynamically create TURN users, an additional deployment of the Linux version of turnserver is required. # If the Windows version is only used for forwarding WebRTC traffic, the built-in TURN can be used with the fixed user information configured in turnserver.conf. ice: server: # 4. ------------Set to true to enable TURN service ------------ enable: true ``` ## Modify`turnserver.conf` When deploying in a containerized environment,the public IP address of the physical machine running TURN must be accessible over the internet.Open the`turnserver.conf`file in the installation package. ```bash # Due to network devices (such as routers, firewalls) performing Network Address Translation (NAT) between internal and external networks, # the TURN server cannot directly obtain its external IP address. Therefore, the external-ip configuration item is used to inform the TURN server of its visible IP address on the internet. # If the external-ip is not specified in the configuration file, the TURN server will attempt to use the default IP address. # However, if the default address is invalid or inaccessible, a reliable TURN connection cannot be established. # By configuring the external-ip, the actual external IP is provided to the TURN server, enabling it to correctly handle and forward network traffic. # For example, use the public IP for cloud virtual machine deployment, and the node IP for local container deployment. # Set to the external IP address of the physical machine external-ip=192.168.0.164 ``` ## Start Services in Docker ```bash sh start.sh ``` ## Start Proxy Service //Note: You need to configure the IP whitelist for interface access.For example,when starting with Docker,use the IP in the admin Docker container,which is typically`172.29.0.20`. Use the following command to start the proxy service ```bash cd /opt/larkxr-center-docker/proxy sh start.sh ``` ## Add Forwarding Service Access the management backend page`http://{ip}:8182`,go to thePort Forwarding Managementpage.After adding the relevant configurations,the initial state of the forwarding client will beOffline.Please note that the public port and client key will be used in subsequent steps. 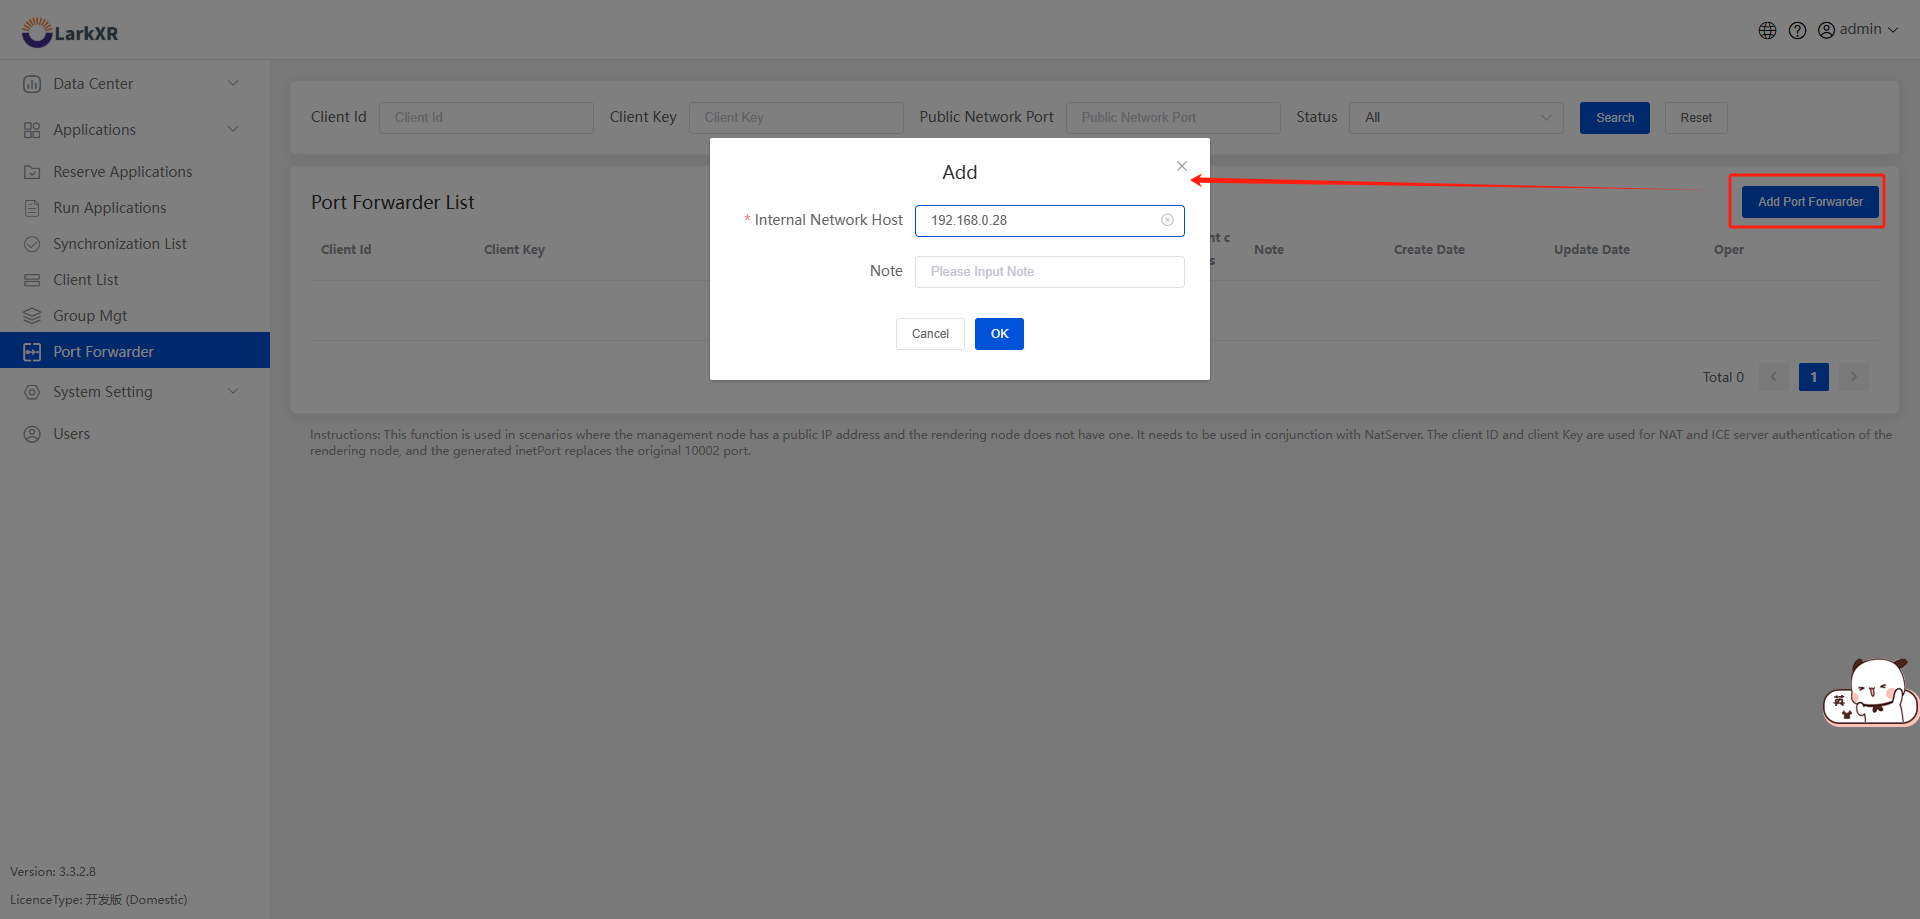 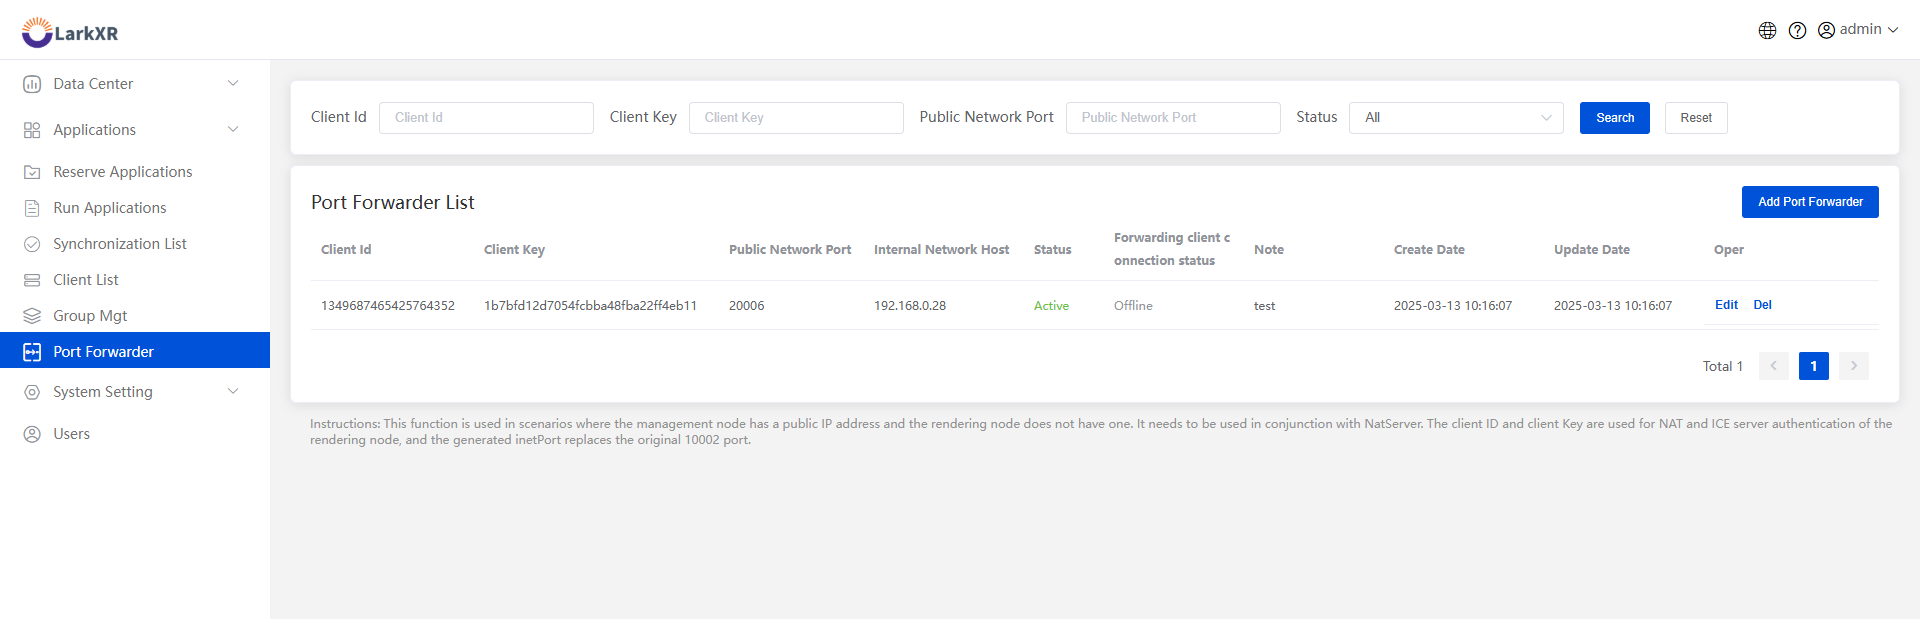 ## Configure Rendering Nodes Modify the`application.properties`file to configure the center management node URL and private IP address. ```bash # Center management node URL, it is usually recommended to configure it to the LarkXR gateway's access address, such as http://192.168.0.20:8181 pxy.admin-server.url=http://192.168.0.164:8181 # !!! This machine's private IP address pxy.host.local-ip=192.168.0.28 ``` Modify the public IP address ```bash # !!! This machine's public IP address: Set this value when public access is required and the node has been assigned a public IP # Change to the public IP of the NAT service pxy.host.public-ip=192.168.0.164 ``` Modify the default port 10002 ```bash # Rendering server: Client connection port - Ordinary TCP port. The "public port" in the forwarding port data. pxy.render-server.listen-port=20006 ``` Modify the forwarding proxy settings ```bash ###########NAT Forwarding Proxy############## # Enable this when using NAT forwarding to solve the issue of lacking a public IP # Change to true pxy.nat-proxy.enable=true # LarkXR management node as NAT client mode # NAT Server IP or domain name # Change to the public IP of the NAT service pxy.nat-proxy.client-mode.server-host=192.168.0.164 pxy.nat-proxy.client-mode.server-port=20001 # clientKey provided by NAT Server # "clientKey" in the forwarding port data pxy.nat-proxy.client-mode.client-key=####### ``` Modify ICE configuration ```bash # Format: turn:47.94.38.44:19303 # The TURN URI for the proxy forwarding service, which is deployed together with the admin by default. The default port number is 13478. pxy.ice.server.uri=turn:192.168.0.164:13478 # "clientId" in the forwarding port data pxy.ice.server.username=1328310734890729472 # "clientKey" in the forwarding port data pxy.ice.server.password=b2f216b331ec4879846a70efdb6f3a43 # Set to 1 to force the use of TURN pxy.ice.transport=1 ``` ## Start Services **Access Application** Access the application overview through the management nodes IP address.Ensure you can correctly enter the application.
admin
2025年4月14日 13:34
转发文档
收藏文档
上一篇
下一篇
手机扫码
复制链接
手机扫一扫转发分享
复制链接
Markdown文件
Word文件
PDF文档
PDF文档(打印)
分享
链接
类型
密码
更新密码
有效期