Here is the translation of the steps to enable voice input for in-app multi-party conversations:
Step One: Install Sound Card Service on the Server
Ensure that the sound card service is installed on the server.
Step Two: Activate Voice Service Authorization
Apply for an authorization code from the developer platform to ensure that voice service authorization is enabled.
Authorization code provided by Pingxing Cloud Business. Contact Pingxing Cloud Business to activate voice service authorization.
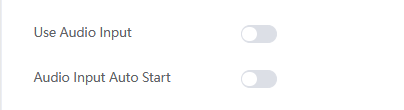
In the application backend settings, allow the use of audio input functionality. This feature will not be visible without authorization.
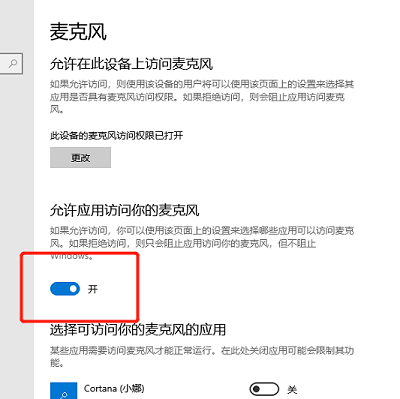
Step Three: Check if the Rendering Server Allows Microphone Access
Ensure that the rendering server allows the application to access the microphone. Access needs to be enabled as shown in the image below:
Step Four: Set Up HTTPS Environment or Use localhost
Set up an HTTPS environment or access the application via localhost.
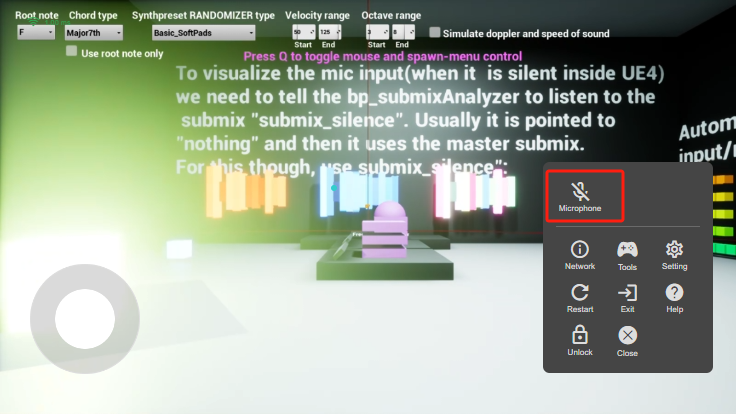
Locate the microphone icon above the control ball in the bottom right corner of the application interface and click to allow microphone usage.
This enables the use of audio input functionality, fulfilling the requirements for multi-party conversations and other voice input-related needs.
By following these steps, you can successfully enable in-app multi-party conversations and meet other voice input-related requirements.
